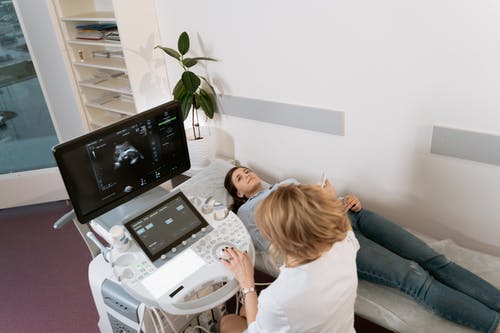
Ultrasound technology has revolutionized the field of medicine by providing real-time, non-invasive imaging that is invaluable for diagnosing and monitoring a wide range of conditions. Whether you’re in obstetrics, cardiology, musculoskeletal imaging, or general medicine, understanding the functionality of the ultrasound machine and the use of its various controls is crucial to obtaining high-quality images.
Ultrasound knobology refers to the understanding and proper manipulation of the ultrasound machine’s controls (or “knobs”) to optimize image quality and improve diagnostic accuracy. This post will explore essential ultrasound knobology tips to help healthcare providers use ultrasound equipment more effectively, obtain the best images, and improve clinical outcomes.
1. Understanding Ultrasound Knobology Basics
Before diving into specific controls and techniques, it’s important to understand the fundamental components of an ultrasound machine and how each control contributes to image quality:
- Gain: Controls the overall brightness of the image by adjusting the strength of the returning ultrasound signals. It’s like adjusting the volume on a radio.
- Depth: Adjusts the vertical field of view, determining how deep into the body the ultrasound probe is visualizing. This is especially useful in tailoring the image to the region of interest.
- Focus: Refines the clarity of the image by adjusting the focal point. This is particularly important in high-resolution imaging.
- Time Gain Compensation (TGC): Allows you to modify the gain at different depths of the image. This helps in compensating for the natural attenuation of sound waves as they travel deeper into the body.
- Freeze: Pauses the image to allow for better viewing and measurement. It is useful when you need to take a closer look or make measurements.
- Zoom: Magnifies a specific area of the image for detailed analysis without changing the overall field of view.
These basic knobs and settings will allow you to manipulate the image to your desired specifications. Now let’s dive into more specific tips and techniques for using these controls effectively.
2. Gain Control Tips: Achieving Optimal Image Brightness
The gain control is one of the most frequently adjusted settings on the ultrasound machine. When too high, the image will be overly bright, possibly masking important details. When too low, the image may be too dark, and small structures may be difficult to visualize.
Gain Tips:
- Adjust Gain Incrementally: Start with a mid-level gain setting and adjust incrementally as needed. Increase the gain if the image is too dark and reduce it if the image is too bright.
- Adjust Gain Based on Depth: As you change the depth of the image, adjust the gain accordingly. Deeper structures typically require increased gain.
- Check for Artifacts: Excessive gain can introduce artifacts, such as “noise” or unnecessary bright spots. If you notice these, reduce the gain slightly to clean up the image.
- Use Gain for Specific Structures: In obstetric or abdominal imaging, structures like the liver or the fetus should be visible with just enough brightness to identify features. Too much gain can obscure details, especially in soft tissues or vessels.
3. Depth Control Tips: Tailoring the Field of View
The depth control allows you to adjust how deep you’re imaging, which is critical for visualizing different body areas and structures.
Depth Tips:
- Optimize the Depth for Each Area: Set the depth to focus on the area of interest. For shallow structures like the thyroid or superficial muscles, a shorter depth is more appropriate. For deeper structures like the kidneys, a greater depth is needed.
- Minimize Wasted Space: If you’re scanning an area like the abdomen or pelvic region, make sure to adjust the depth so that you’re not wasting space by showing unnecessary tissue above or below the target organ.
- Use Depth for Resolution: The deeper the depth setting, the less resolution you’ll have. If you need to zoom in on a specific structure, you may need to reduce the depth to sharpen the image.
4. Focus Control Tips: Sharpening Your Image
The focus control is one of the most powerful tools for enhancing image quality. It works by improving the resolution at specific depths, allowing for better visualization of structures within that focal zone.
Focus Tips:
- Position the Focus at the Region of Interest: Always position the focus on the target organ or structure. For instance, if you’re evaluating the fetal heart in obstetric imaging, place the focus at the level of the fetal heart for better detail.
- Use Multi-Focus When Available: Many modern ultrasound machines allow you to set multiple focal zones. This is particularly useful when scanning deeper structures to maintain image sharpness at various depths.
- Avoid Over-Focusing: Having too many focal points can degrade image quality and introduce artifacts. Limit the number of focus points to the most important ones to maintain clarity without sacrificing image quality.
5. Time Gain Compensation (TGC) Tips: Enhancing Image Contrast
TGC allows you to adjust the gain at different depths, compensating for the natural attenuation of sound waves. This is crucial for imaging structures at varying depths and achieving balanced image brightness.
TGC Tips:
- Balance the TGC Curve: Adjust the TGC to ensure the image has adequate brightness at both shallow and deep levels. If the image is too dark at deeper structures, increase the gain at the lower part of the screen.
- Use TGC for Heterogeneous Tissue: When scanning structures that vary in density, such as the liver or kidney, adjusting the TGC can help enhance the contrast and make subtle pathologies more apparent.
- Consider the Patient’s Anatomy: In obese patients or those with a significant amount of subcutaneous fat, you may need to adjust the TGC settings to increase the gain in deeper structures.
6. Freeze and Zoom Tips: Maximizing Diagnostic Detail
The freeze and zoom buttons are essential tools for taking a closer look at structures and for measuring objects within the image. Proper use of these controls can enhance diagnostic accuracy.
Freeze Tips:
- Freeze During Key Moments: Use the freeze function to capture specific moments, especially during critical times like fetal heartbeats or when measuring anatomical structures.
- Review and Measure with Freeze: After freezing the image, take your time to measure structures (e.g., fetal size or cyst dimensions) accurately.
Zoom Tips:
- Zoom on Areas of Interest: Use zoom to enhance specific structures for detailed examination without changing the overall depth or field of view.
- Beware of Zoom Artifacts: Excessive zooming can distort the image and reduce the quality. Use zoom sparingly and only on clear areas where detail is required.
7. Optimizing Image Quality for Specific Exam Types
Different ultrasound applications require specific settings to achieve the best results. Below are some tips tailored to specific types of ultrasound exams:
Obstetric Ultrasound Tips:
- Fetal Heart Rate: Use color Doppler to measure the fetal heart rate in early pregnancy. In later pregnancy, use pulse Doppler to visualize and assess the fetal heart rate.
- Placenta: Ensure the placenta is clearly visualized and adjust focus and gain settings to better view the structure and the surrounding uterine wall.
Musculoskeletal Ultrasound Tips:
- Adjust Depth for Superficial Structures: For joint, tendon, or muscle imaging, decrease the depth to focus on the area of interest while maintaining a good resolution.
- Use Linear Probe: A linear probe with a high frequency is ideal for musculoskeletal imaging to provide better resolution of superficial tissues.
Abdominal Ultrasound Tips:
- Optimize Focus for Visceral Organs: For abdominal organs like the liver, kidneys, and pancreas, position the focus at the level of the organ of interest and adjust depth according to the body type of the patient.
- Increase Gain for Solid Organs: Solid organs like the liver or spleen may require higher gain to visualize small structures or masses clearly.
8. Additional Knobology Tips for Ultrasound Excellence
- Use a Steady Hand: The quality of the image depends not only on the settings but also on how steadily you hold the probe. Minor movements can create blurring or artifacts.
- Adapt for Different Body Types: Patients with larger body types may require different settings for depth and gain compared to patients with a thinner physique.
- Keep the Probe Clean: Ensure that the ultrasound probe is clean and well-lubricated with gel to ensure clear imaging and prevent artifacts.
Conclusion
Mastering ultrasound knobology is essential for clinicians looking to get the most out of their ultrasound machine and produce the best possible images for diagnosis and treatment planning. By understanding the key ultrasound controls—gain, depth, focus, TGC, freeze, and zoom—and applying these tips effectively, you can enhance your imaging skills, reduce diagnostic errors, and improve patient outcomes. Regular practice and familiarity with the machine will help you become more efficient and confident in your ultrasound practice, enabling you to provide the best care possible.